The user with access rights can edit the existing provider details. However, the password can be reset only by the practice admin users.
To edit provider details:
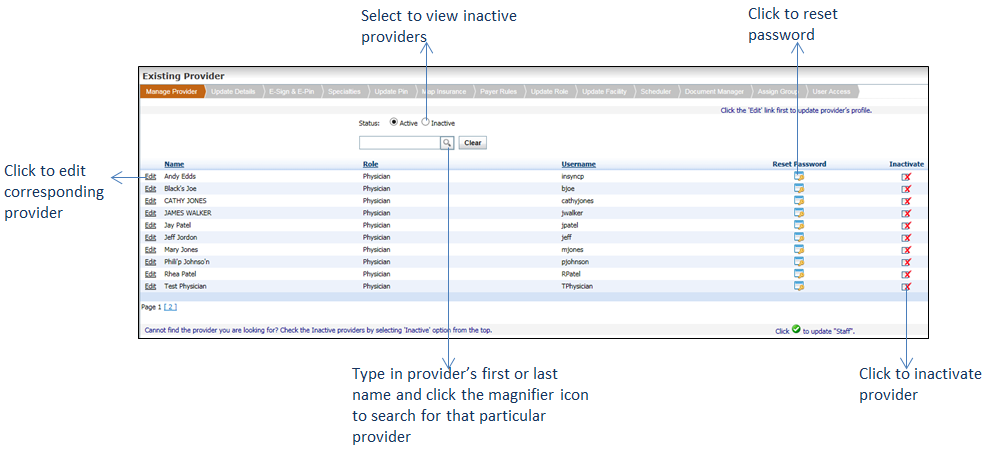
| 1. | On the User Management Screen, click Existing User. A pop up message is displayed. |
| 2. | Click Provider. The Existing Provider screen is displayed with the list of active providers. |
*Notes:
| • | The Reset Password column is displayed only for practice admin users. Click the icon to reset the password for the provider. icon to reset the password for the provider. |
| • | To switch over to edit a staff user, click the icon at the bottom right corner of the screen. icon at the bottom right corner of the screen. |
| 3. | Click the Edit link corresponding to the provider you wish to edit. The Update Details page is displayed. |
*Note: Use the  icon to search for a particular provider to edit.
Note: Throughout the wizard, click Save & Previous to save the details and navigate to the previous page.
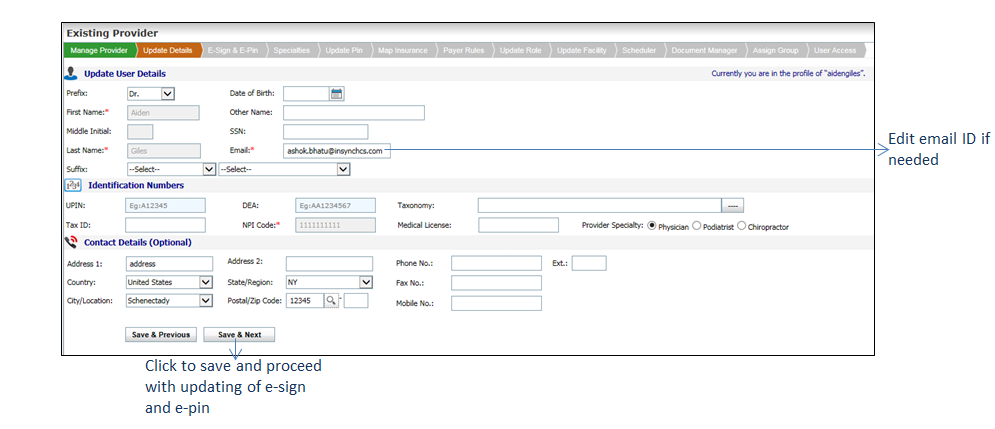
| 4. | On the Update Details page, edit the necessary details. The fields greyed out cannot be edited. |
| • | In the Update User Details section, edit the Prefix, Date of Birth, Other name, SSN, Email, and Suffix if necessary. |
| • | In the Identification Numbers section, edit the UPIN, DEA, Taxonomy, Tax ID, Medical License, and Provider Specialty if necessary. |
| • | In the Contact Details section, edit the address details and contact details if necessary. |
| 5. | Click Save & Next. The E-Sign & E-Pin page is displayed. |
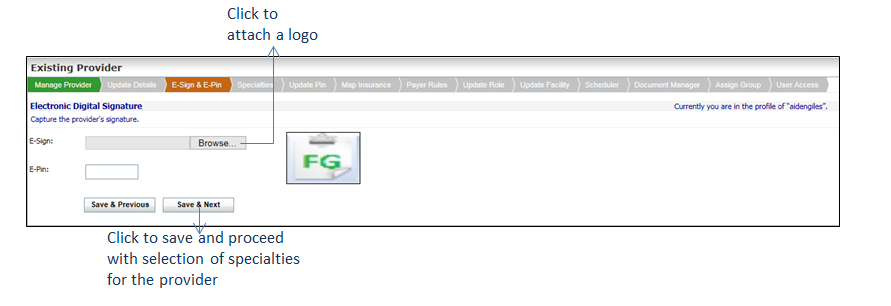
| 6. | On the E-Sign & E-Pin page, do the following: |
| • | Click Browse to attach a logo if necessary. |
| • | Enter the EPIN details if necessary. |
| 7. | Click Save & Next. The Specialties page is displayed. |
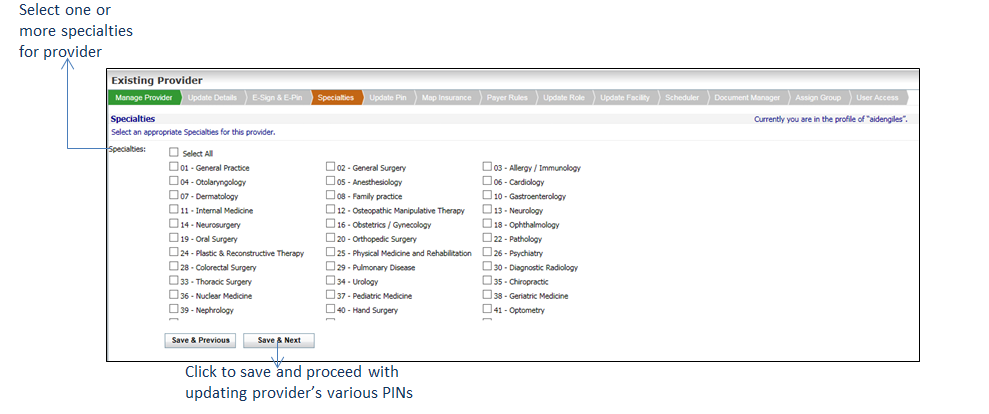
| 8. | On the Specialties page, select one or more specialties or select the “Select All” check box to select all specialties for the provider. |
| 9. | Click Save & Next. The Update Pin page is displayed. |
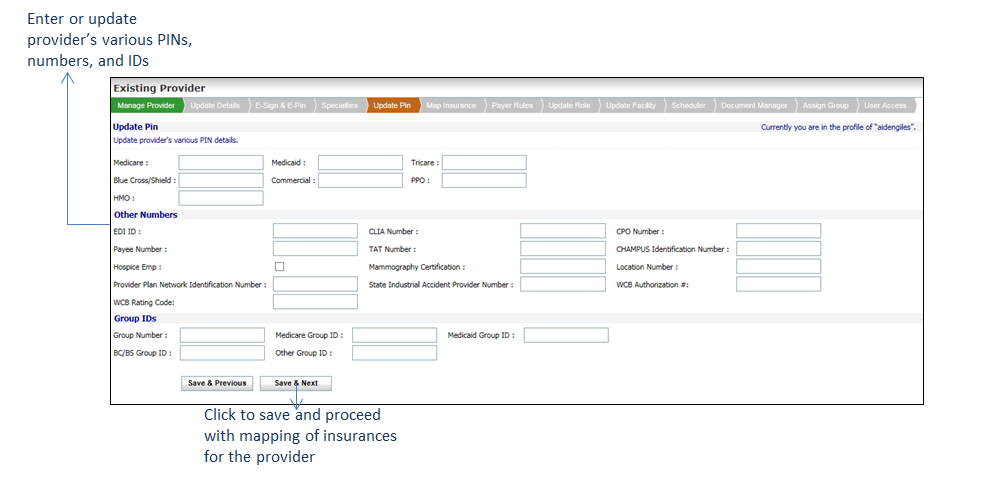
| 10. | On the Update Pin page, edit the necessary details in Update Pin, Other Numbers, and Group IDs sections. |
| 11. | Click Save & Next. The Map Insurance page is displayed. |
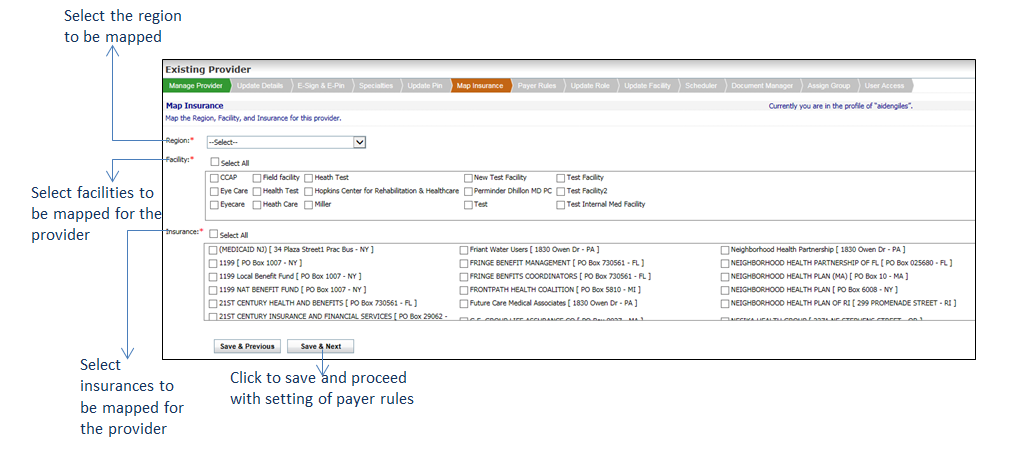
| 12. | On the Map Insurance page, do the following: |
| • | Select the Region from the drop-down list. This field is mandatory. |
| • | Select one or more facilities or select the “Select All” check box to select all facilities for the provider. This field is mandatory. |
| • | Select one or more insurances to map or select the “Select All” check box to select all insurances for the provider. This field is mandatory. |
14. Click Save & Next. The Payer Rules page is displayed.
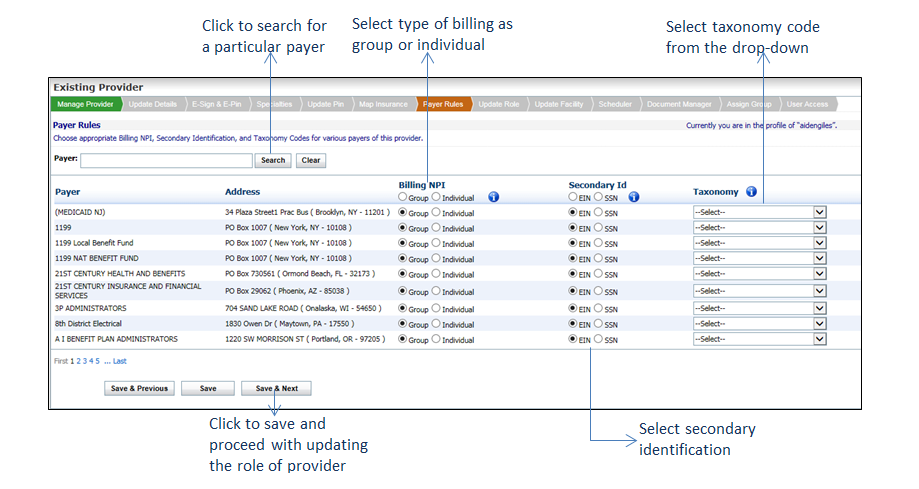
| 13. | On the Payer Rules page, edit the Billing NPI, Secondary Id, and Taxonomy details for various payers of the provider if necessary. |
*Note: You can user the Search option to search for particular payer to edit.
| 15. | On the Update Role, Update Facility, Scheduler, Assign Group, and Assign Permission pages, edit the details wherever necessary and click Save. Refer to the Adding a New Staff User section above for the explanation of these screens. |