Configuring Templates for Custom Clinical Forms

Contents
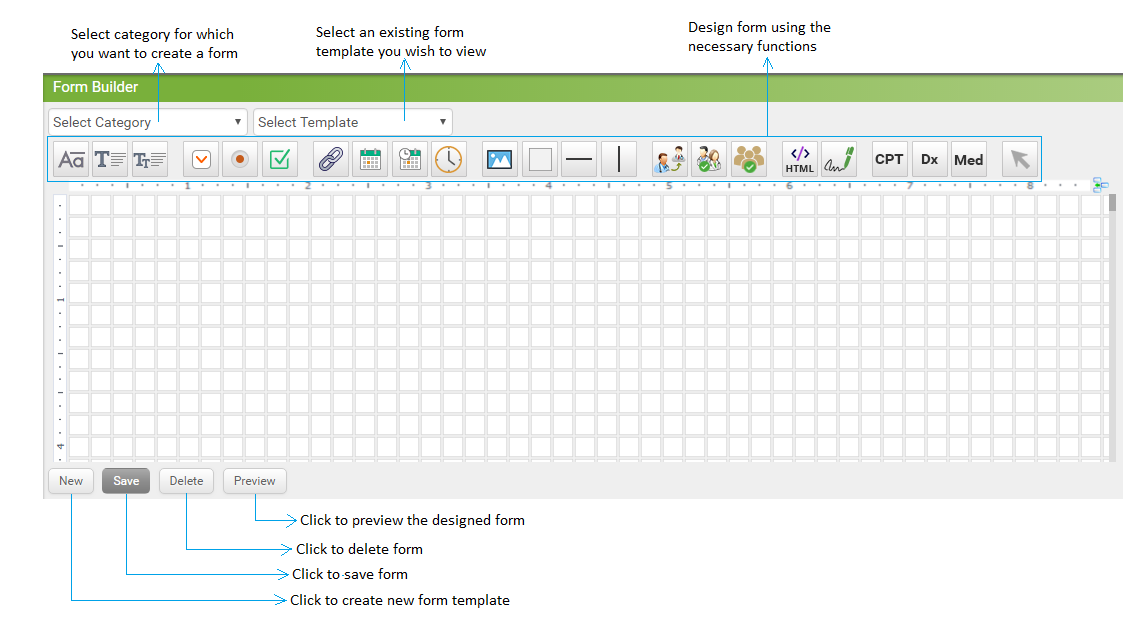
To configure the custom clinical form template:
| 1. | From the left menu items, click Administration > EMR > Form Builder. The Form Builder screen is displayed. |
| 2. | Select the Category from the drop-down list for which you want to create a clinical form. The options are Patient Demographics, History, Encounter, Health Maintenance, Immunization, Treatment Plan, Facesheet, Chief Complaints/HPI, Problem List, Vitals, Medications/Allergies, ROS, Results/Order Queue, Physical Exam, Diagnosis, Review of Result, Supplementary, Patient Forms, and Custom Template. |
| 3. | Click New at the bottom of the screen. |
| 4. | Design the clinical form by selecting the necessary functions from the toolbar shown on the top. |
| 5. | Click Save. A script prompts for the template name. |
| 6. | Enter the Template Name. |
| 7. | Click OK. A new template is created and is added to the Select Template drop-down list. The template can be viewed in the Custom Clinical Form for that particular Category for which it was created. |
| 8. | To edit the existing template, select the category and template from the drop-down list, edit the details wherever necessary and click Save. |
| 9. | To delete the existing template, select the template from the drop-down list, and click Delete. |
| 10. | To preview the template created/edited, click Preview. |
Available Functions:
Label
|
Date-Time Picker
|
Provider Selection
|
Textbox
|
Time Picker
|
Staff/User selection
|
Multi-line textbox
|
Picture
|
HTML Control
|
Dropdown
|
Rectangle
|
Sign control
|
Radio Button
|
Horizontal Line
|
CPT
|
Checkbox
|
Vertical Line
|
Diagnosis
|
Link
|
Referring Provider |
Current |
Date Picker
|
Selection
|
Medications
|