To configure patient category, review result type, relationship, illness status, and so on:
| 1. | From the left menu items, go to Administration > Setup > Master Maintenance. The Master Maintenance screen is displayed. |
| 2. | On the Master Maintenance screen, by default, the Claim Attributes option is selected in the Select Master drop-down list. Enter a relevant description in the Attribute field and click Save. The Claim Attribute is then added to the list below. The details added can be viewed on the New Charge screen (Search Claim tab) as a drop-down value in the Claim Attribute field. |
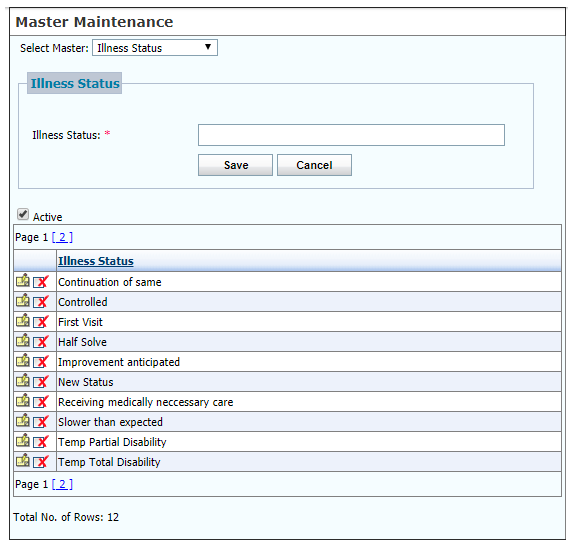
| 3. | In the Select Master field, select Illness Status from the drop-down list. Enter the description in the Illness Status field and click Save. The Illness Status is added to the list below. The details added can be viewed in the Diagnosis/Assessment charting element as a drop-down value for the Illness Status field. |
| 4. | In the Select Master field, select Immunization Route from the drop-down list. Enter the description in the Route field and click Save. The Route is added to the list below. The details added can be viewed in the Immunizations charting element as a drop-down value for the Route field. |
| 5. | In the Select Master field, select Immunization Site from the drop-down list. Enter the description in the Site field and click Save. The Site is added to the list below. The details added can be viewed in the Immunizations charting element as a drop-down value for the Site field. |
| 6. | In the Select Master field, select Patient Category from the drop-down list. Enter a relevant description in the Category Description field and click Save. The Patient Category is added to the list below. The details added can be viewed on the Patient Information screen as a drop-down value in the Patient Category field. |
| 7. | In the Select Master field, select Patient Contact Type from the drop-down list. Enter a relevant description in the Contact Type field and click Save. The Patient Contact Type is added to the list below. The details added can be viewed on the Additional Information screen (Additional Contact tab) as a drop-down value in the Contact Type field. |
| 8. | In the Select Master field, select Patient Race from the drop-down list. Enter relevant details in the Patient Race tab and click Save. The Patient Race is added to the list below. The details added can be viewed on the Patient Information screen (Patient Details tab) as a drop-down value in the Race field. |
| 9. | In the Select Master field, select Ethnicity from the drop-down list. Enter relevant details in the Patient Ethnicity tab and click Save. The Patient Ethnicity is added to the list below. The details added can be viewed on the Patient Information screen (Patient Details tab) as a drop-down value in the Ethnicity field. |
| 10. | In the Select Master field, select Relationship from the drop-down list. Enter the description in the Relationship field and enter the code in Relationship Code field. Click Save. The Relationship is added to the list below. The details added can be viewed as a drop-down value for the Relationship field. You can change the sequence of the relationship to be displayed in drop-down by clicking the icon to move the record down and clicking the icon to move the record down and clicking the icon to move the record up. icon to move the record up. |
| 11. | In the Select Master field, select Review Result Type from the drop-down list. Enter the description in the ROR Description field and click Save. The Review Result Type is added to the list below. The details added can be viewed in the Review of Results charting element as a drop-down value for the Type field. |
Notes:
| • | Click the edit icon  to edit the details added. to edit the details added. |
| • | Click the inactivate icon  to inactivate the details added. to inactivate the details added. |
| • | You cannot edit or inactivate the items that are preconfigured during implementation. You must contact INSYNC EMR Support to edit or inactivate such items. |
| • | Deselect the Active check box to view the list of inactive records. |
| • | Click the activate icon  to reactivate the corresponding record. to reactivate the corresponding record. |