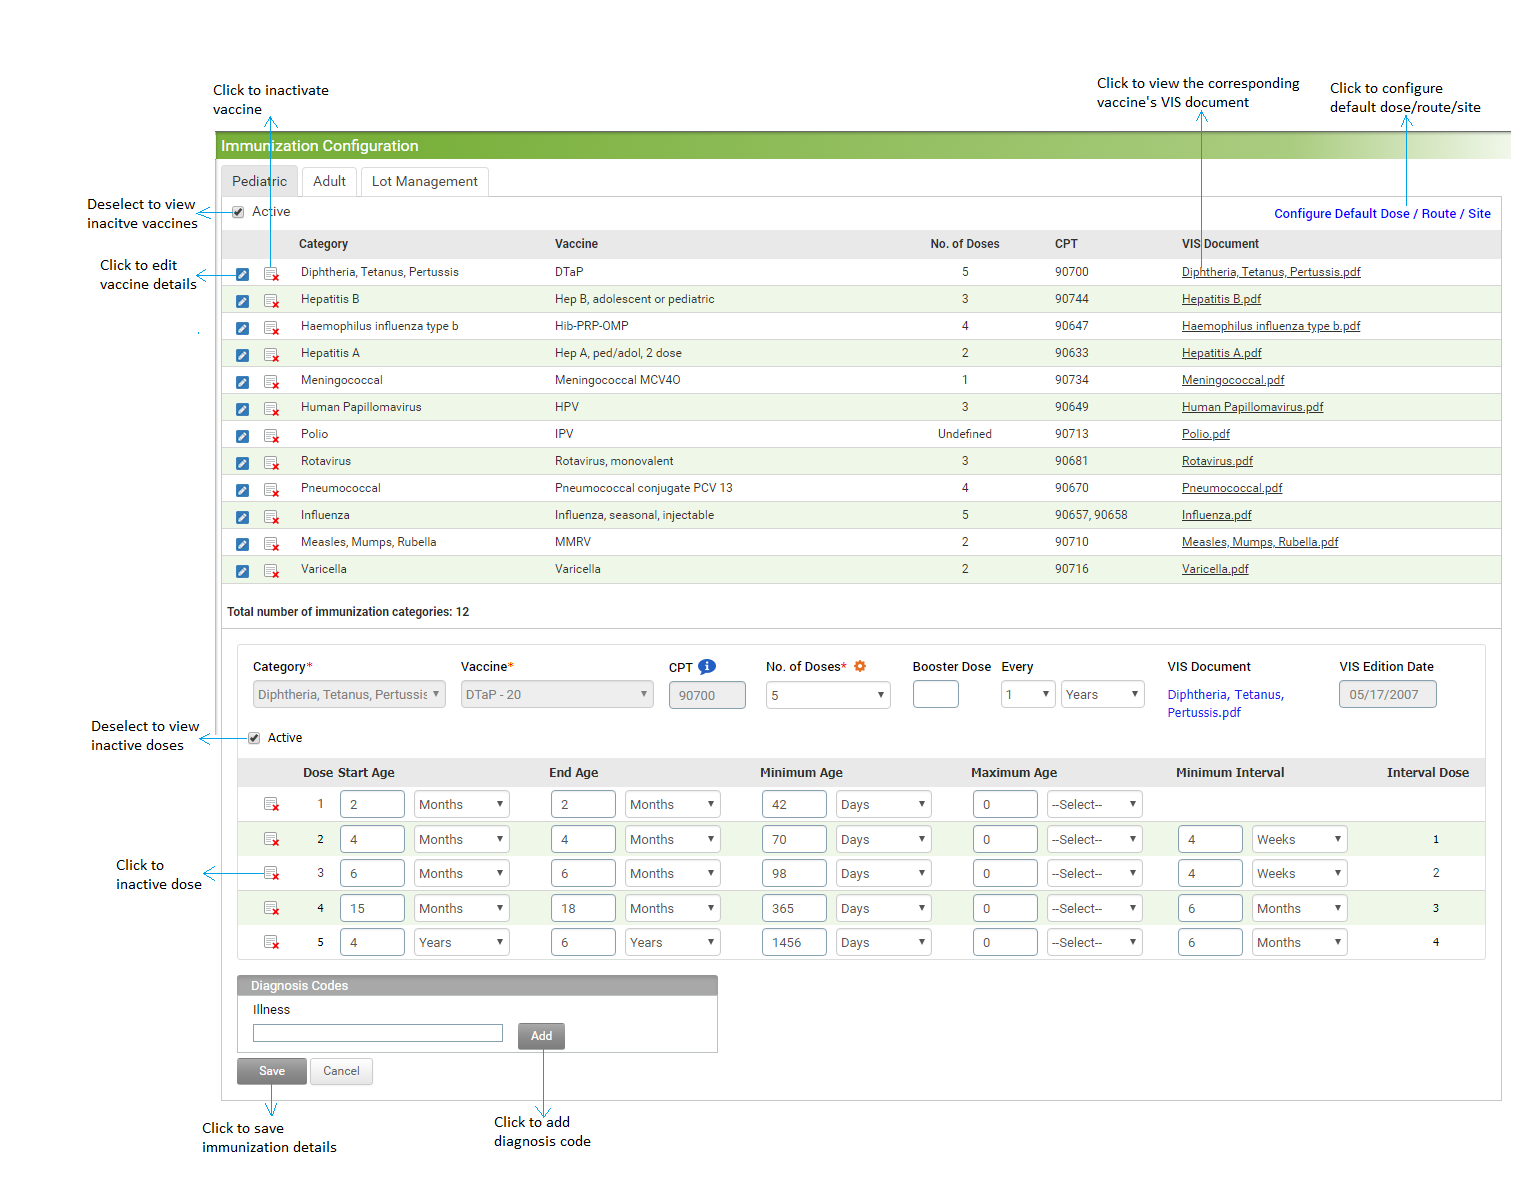
Immunizations for pediatric patients are preconfigured as per CDC vaccine tracker rules. The user can edit the details, such as number of doses, and CPT code. The lot number, manufacturer details, expiry date, and purchased date of vaccination can be added for each category of immunization.
To configure immunization for pediatric patients:
| 1. | From the left menu items, click Administration > EMR > Immunization. The Immunization Configuration screen opens. |
| 2. | A list of preconfigured immunizations is displayed. To add any new category or vaccine, you must contact the INSYNC EMR Support team. |
| 3. | Click the edit icon  corresponding to the vaccine you want to edit the details. corresponding to the vaccine you want to edit the details. |
| 4. | In the edit section, do the following: |
| • | The Category field, Vaccine field and CPT fields are auto-populated and disabled. |
| • | Select the No. of Dose as 1, 2, 3, 4, or 5 from the drop-down list. This field is mandatory. Based on the number selected, the dose details are displayed in the following grid. In the Dose details grid, do the following: |
| o | Start Age: Enter the age that qualifies the patient to receive the respective dose. E.g., when you enter “6 months” in this field, the immunization chart will display this as a “due dose” when the patient is exactly age 6 months and as “next due dose” when the patient is not 6 months old. Once the patient exceeds the age even by one day, this dose will be displayed as “overdue dose.” This field is mandatory. |
| o | End Age: Enter the age up to which the patient should be qualified for the respective dose. This field is mandatory. |
| o | Maximum Age: Enter the age after which the patient should not be qualified for the respective dose. E.g., when you enter “2 years” in this field, the immunization chart will not allow you to record the dose once the patient exceeds this age. |
| o | Minimum Age: You may want to administer the dose to the patient before the qualifying age to receive the respective dose. E.g., when you enter “50 days” in this field, and the patient’s starting age to receive this dose is configured as 2 months, the system will allow you to administer the dose when the patient is 50 days of age. This field is mandatory. |
| o | Minimum Interval: This is the minimum interval to be maintained between 2 doses. This field is mandatory. |
*Note: Click the  icon to inactivate a particular dose. Deselect the Active check box above the Dose details grid to view the list of inactive records.
| • | The VIS Document attached is preconfigured and directly derived from the CDC website. |
| • | The VIS Edition date is auto populated and disabled. |
| • | You can also associate the diagnosis code with any vaccine by just adding the illness in the diagnosis codes section. |
Note: Adding Diagnosis codes will be useful when creating new charge.
| • | Click Save to save the changes. |
*Note: Click the icon to inactivate a particular immunization. Deselect the Active check box to view the list of inactive immunizations. Click the activate icon  to activate the corresponding immunization.
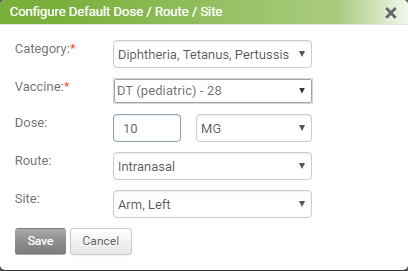
To configure Default Dose / Route / Site
In the configure tab, do the following:
| • | Select the category from the drop down list. |
| • | Select the Vaccine from the drop down list. |
| • | Select Route & Site from the drop down list. |