Adding a New User

Contents
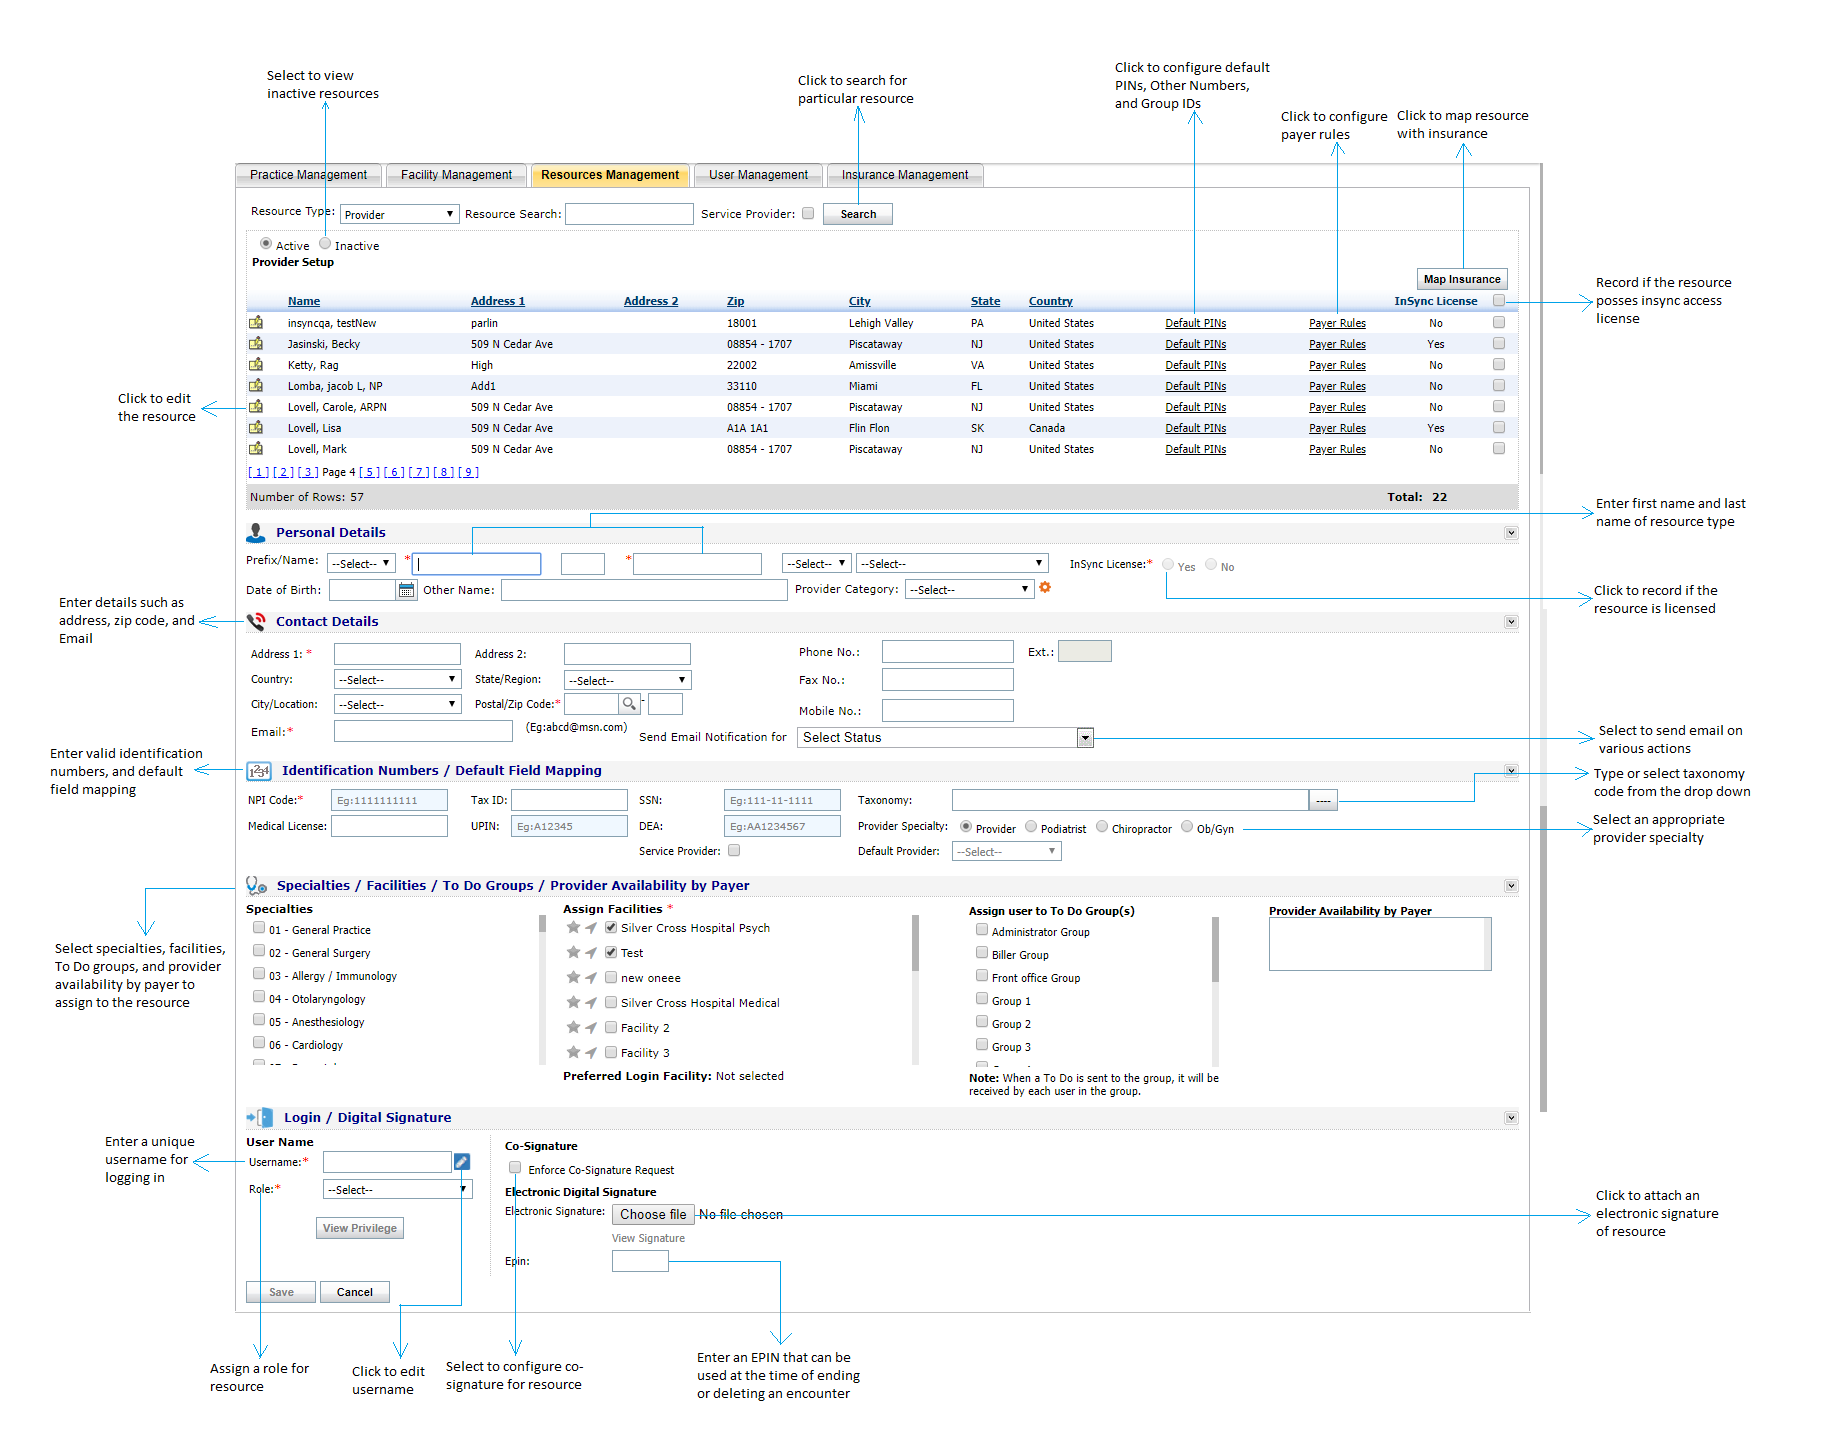
Once in the Resources Management screen, the Admin can add new users to the system and decide under which Resource Type to place them. The most commonly used Resource Types are Provider, Referring Provider, and Staff. The “Active” button is preselected on this screen to display active resources only; click the “Inactive” radio button to view inactive resources. The total number of users displayed will appear at the bottom left corner of the window.
To add a new user to the system (* = required field):
| 1. | Select the Resource Type (e.g., Staff) to categorize the user by using the drop-down menu. |
*Note: The resource types “Provider,” “Assistant,” and “Practice Admin” are configured during the implementation process. The user can add staff members, referring Provider, PCP, other, supervising Provider, attending Provider, ordering Provider, and user group. Additionally, the user can add “Equipment” and “Space” that help in creating scheduler profiles.
| 2. | Enter the user’s Name/DOB in the Personal Details section. Select appropriate category from the Provider Category drop-down based on the specialty of provider. |
*Note: Use the ![]() icon to select the user’s DOB from the Calendar.
icon to select the user’s DOB from the Calendar.
| 3. | Fill in the user’s contact information in the Contact Details section. |
*Note: An e-mail address must be provided for the user to receive his/her username.
| 4. | Enter the user’s SSN, UPIN, Tax ID, Medical License, NPI Code, and/or Taxonomy or DEA # (if applicable) in the sample format provided. |
*Note: Required elements are based on selected resource type.
| 5. | Assign a Facility or Specialty to that user by clicking in the check box(es). |
| 6. | Assign one or more To Do groups to that user by clicking in the check box(es). |
*Note: This allows the user to receive all the To Dos that are assigned to the group.
| 7. | Select one or more statuses to send email notifications. (E.g. For To Do, Block Appointment, Checked In Appointment, Check Out appointment, Cancel Appointment, Delete Appointment, Message, and Urgent Message.) |
| 8. | Select one or more provider availability payer to that user by selecting from drop down list. |
| 9. | Enter User Name in the designated box. Click the edit icon |
| 10. | Assign the user’s Role using the drop-down menu. |
*Note: Each Role is assigned specific permissions, which are configured during the Implementation process.
When you are finished, click the “Save” button. The Admin will then see a confirmation message indicating that the resource has been added successfully.
The newly created user will now appear in the list of existing users on the Resources Management screen. The user’s username will be e-mailed to him/her at the address provided; the user will be prompted to change this password upon initial log-in.
Note: Because InSync is licensed per provider, users must contact Support to add additional providers and assistants to the system, as additional fees may apply.