From the User Management tab, you can add a new staff user. The user creation, role and facility assignment, username and password generation, scheduler setup, folder access, time card permission, access control, and direct e-mail mapping can be done from one place.
To add a new staff user:
| 1. | On the User Management screen, click New User. A wizard opens up on the Add New User screen. |
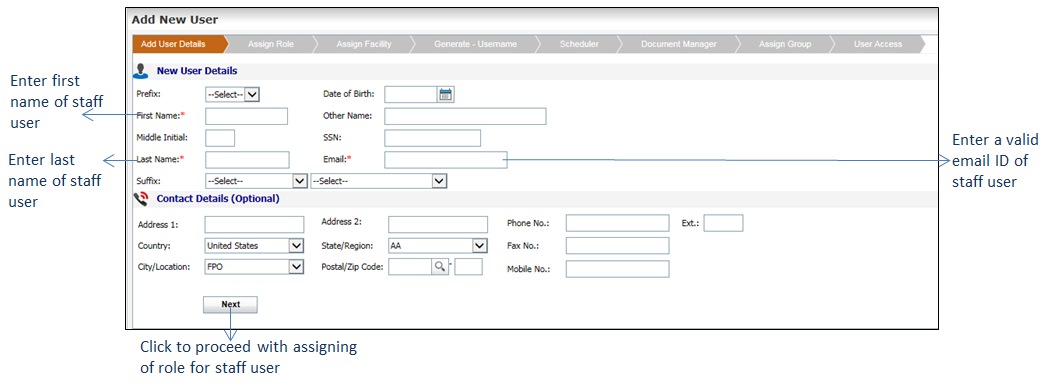
| 2. | On the Add User Details page, enter the necessary details. |
| • | In the New User Details panel, do the following: |
| o | Enter the First Name, Last Name, and a valid Email Address. These fields are mandatory. |
| o | Select the Prefix and Suffix from the drop-down list. |
| o | Enter the Middle Initial, Date of Birth, Other Name, and SSN. |
| • | In the Contact Details panel, do the following: |
| o | Enter correct address details and contact numbers. |
| o | Select the State/Region and City/Location from the drop-down list. |
| o | Enter the Postal/Zip Code (5-digit) or select the zip code using the  icon. Once the zip code is selected, the corresponding city and state will be auto-populated. You can add a new zip code by clicking the icon. Once the zip code is selected, the corresponding city and state will be auto-populated. You can add a new zip code by clicking the  icon. In addition to the 5-digit zip code, additional 4 digits can be entered in the Text field nearby. icon. In addition to the 5-digit zip code, additional 4 digits can be entered in the Text field nearby. |
| 3. | Click Next. The Assign Role page is displayed. |
Note: Throughout the wizard, click Previous to navigate to the previous screen and click Next to proceed to the next step.
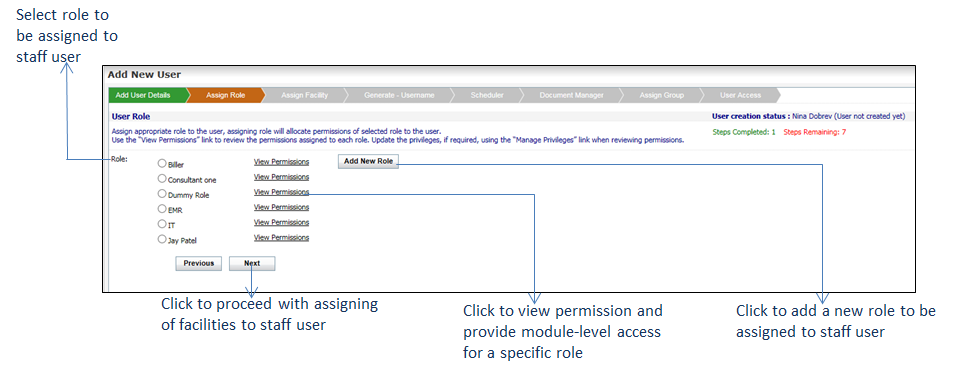
| 4. | On the Assign Role page, select the role to be assigned to the user. |
| • | To add a new role, do the following: |
| o | Enter the Role Name. This field is mandatory. |
| o | Select the e-Prescription Role from the drop-down list. This field is optional. Based on the e-prescription role selection, access to Prescribe Medications section will vary. If the e-prescription role is not selected, the user will not be allowed to prescribe medications. Such users are intimated with a message “User does not have e-Prescription role assigned” when they try accessing the Prescribe Medications section. |
| • | To view permission and provide module-level access for a specific role, do the following: |
| o | Click the View Permissions link next to the role. The View Role screen is displayed. |
| o | Select one or more modules to provide access to the role. |
| o | Click Assign Modules. The Manage Privileges link is displayed. |
| o | Click the Manage Privileges link correspondingly to the module to provide module-level access. |
| o | Select appropriate check boxes next to the function names. |
| 5. | Click Next. The Assign Facility page is displayed. |
| 6. | On the Assign Facility page, select one or more facilities or use “Select All” button to assign all the facilities to the user. |
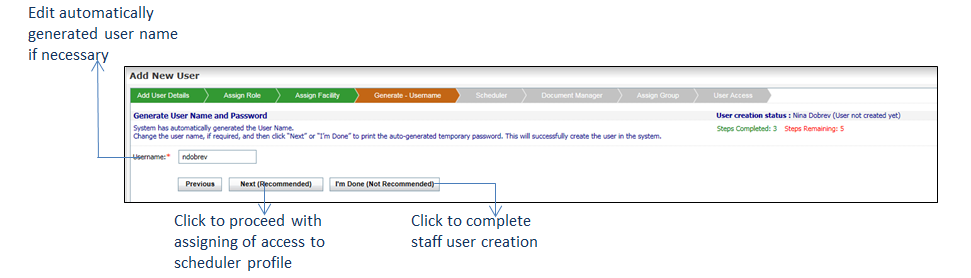
| 7. | Click Next. The Generate Username page is displayed. |
| 8. | The username is automatically generated by the system. Change the username, if necessary and do the following: |
| • | To proceed further with providing access on the remaining features in the wizard, click Next. |
| • | To finish creating user here and provide access on the remaining features at later stage, click I’m Done. |
*Note: It is recommended to click the Next button and provide access on the remaining features.
| 9. | On clicking Next or I’m Done, the username and a temporary password are generated as shown in the following screen. Click Print to print the details and provide them to the user. |
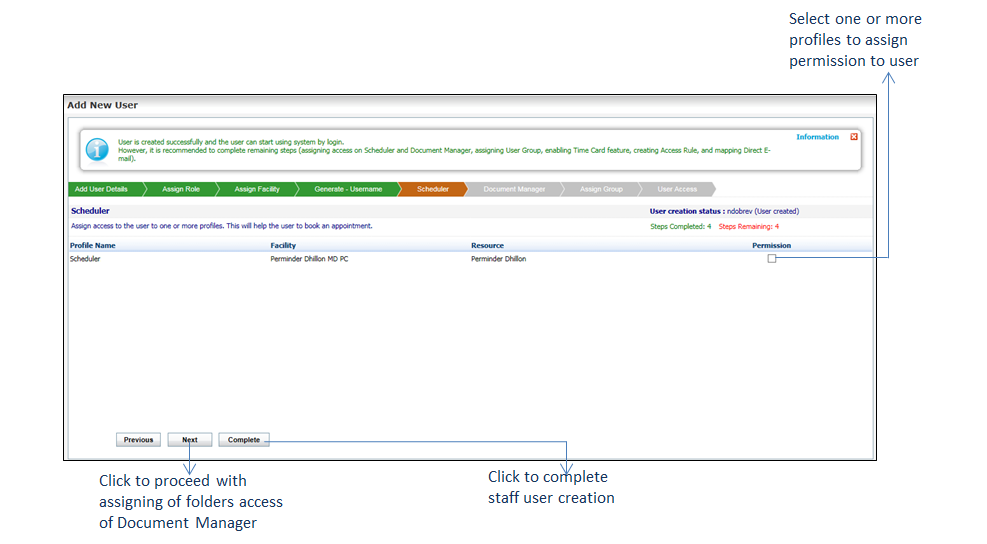
| 10. | Click CLOSE to close the screen. The Scheduler page is displayed. |
| 11. | On the Scheduler page, select one or more profiles to assign permission to the user. |
| 12. | Click Next. A pop up message is displayed as follows: |
| • | To assign the permissions defined in the Roles & Permissions section, click Default permission. This skips the Document Manager page and Assign Group page is displayed. |
| • | To over-write the permissions defined in the Roles & Permissions section, click Folder specific permission. The Document Manager page is displayed. |
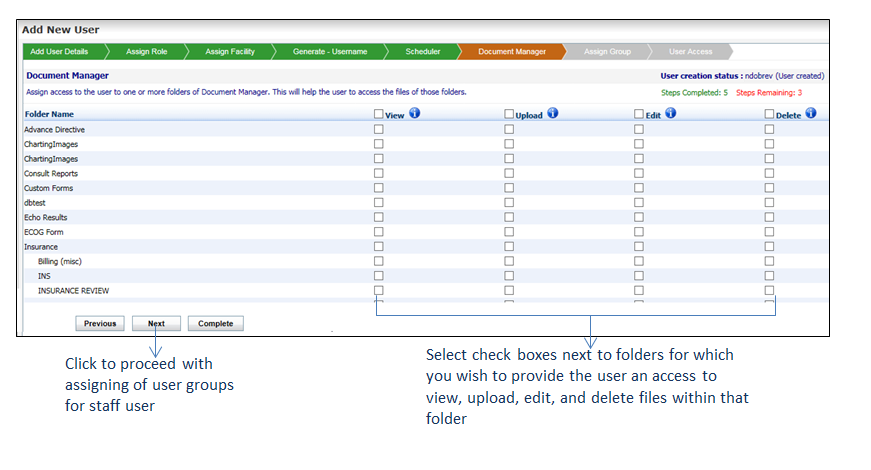
| 13. | On the Document Manager page, select the check boxes next to the folders for which you wish to provide the user an access to view, upload, edit, and delete the files within that folder. |
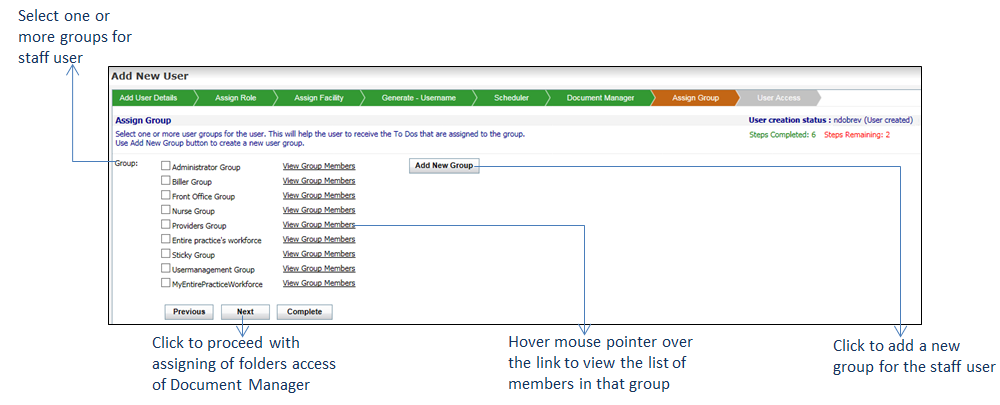
| 14. | Click Next. The Assign Group page is displayed. |
| 15. | On the Assign Group page, select one or more groups you wish to assign to the user. |
| • | To add a new group, do the following: |
| o | Enter a group name. This field is mandatory. |
| o | Select one or more users to be added to the group or select “Select All” check box to select all users. This field is mandatory. |
| o | To edit a group, click the icon. icon. |
| o | To inactivate a group, click the  icon. To reactivate it, select the Inactive option and click the icon. To reactivate it, select the Inactive option and click the icon. icon. |
| o | You can search for a group using the Search button. |
| • | Hover mouse pointer over the View Group Members link to view the list of members in that group. |
| 16. | Click Next. The User Access page is displayed. |
*Note: The Direct E-mail Mapping feature is displayed only for Practice Admin users. To enable this feature, please contact the InSync EMR Support.
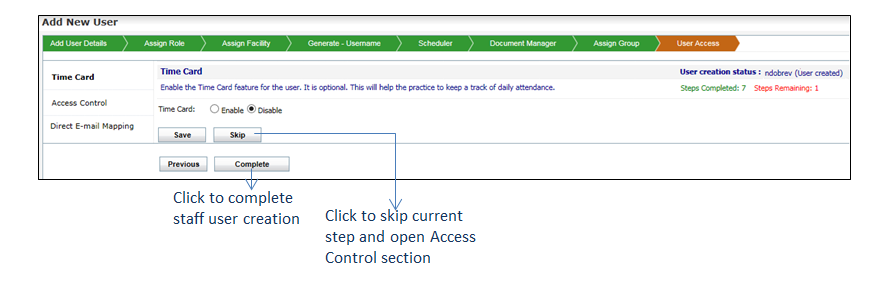
| 17. | On the User Access page, do the following: |
| • | In the Time Card section, do the following: |
| o | Select Enable or Disable option to enable or disable the feature. Enabling this feature helps the practice to keep a track of daily attendance. |
| o | Click Save. Clicking Skip opens the Access Control section. |
| • | Click Access Control from the left side to create a rule for user based on which the user can be restricted forever or for some specific duration to access the system. For details on Access Control, refer to the Access Settings in the Administration section. Click Save the details. |
| • | Click Direct E-mail mapping from the left side to map one or more direct e-mail addresses so that the user can send and receive e-mails from the mapped direct e-mail addresses. Select one or more direct e-mail addresses and click Save. Clicking Skip opens the Time Card section. |
| 18. | Click Complete. The staff user is added successfully. |