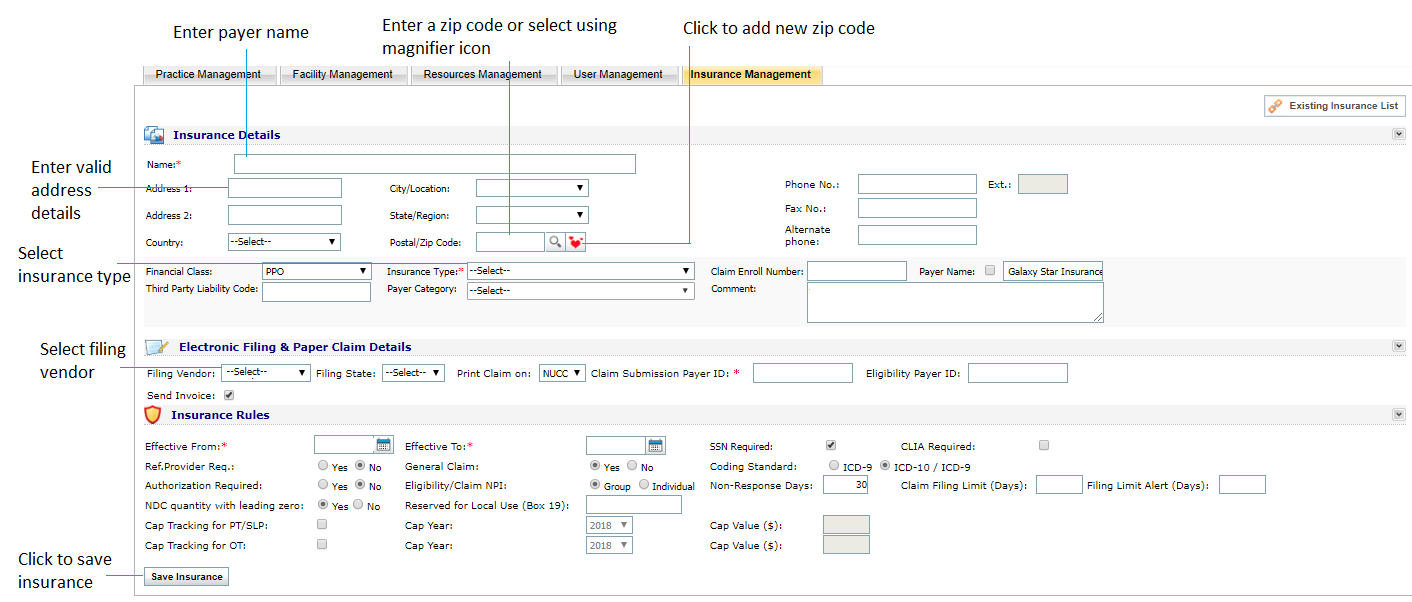
Click the “Add New Insurance Button,” located at the top right corner of the screen, to open the Add New Insurance window.
Once here, the user should fill out the following fields under Insurance Details (* = required field):
| 2. | Enter the payer Address. |
| 3. | Enter the Postal/Zip Code of the payer. Clicking the  icon will auto-populate the City/Location and State/Region fields. icon will auto-populate the City/Location and State/Region fields. |
| 4. | Choose the Country, if outside the US. |
| 5. | Enter the Phone and Fax Numbers for the payer using the appropriate text box. |
| 6. | Select the Financial Class using the drop-down menu. |
| 7. | Select the Insurance Type using the drop-down menu. |
| 8. | Enter any Comments you want to associate with the payer into the free-form text box. |
| 9. | Enter the Payer Name into the text box if different than that in the Name field. |
| 10. | Enter the Third Party Liability Code in the text box provided. |
If filing electronically, the user is required to select a filing vendor and a Payer ID. To indicate electronic filing:
| 1. | Select a Filing Vendor (Gateway EDI or MDOL) from the drop-down list. |
| 2. | Select a Filing State from the drop-down list. |
| 3. | Select the medium on which you want to Print the Claim. |
| 4. | Enter the Claim Submission Payer ID. |
| 5. | Select to send invoice check box to send invoice. |
The user is also able to set basic rules with regards to that insurance. To add Insurance Rules:
| 1. | Select whether you want to copy from existing Insurance using the appropriate radial button. |
| 2. | Select the Insurance you wish to copy from (if applicable) from the drop-down menu. |
| 3. | Click the “Copy Insurance” button. |
*Note: When you click on No in Copy Insurance, the system will ask you to set the rules. Choose the rules per your need.